How to Make the Friendship Bracelets (Taylor’s Version)
Your beadie besties from Team WSW love to play music while working around the studio - packing orders, listing products, slinging beads, & beyond. We take turns playing DJ to keep things interesting and prevent musical burnout.
Most days Carter loves to play Trevor Hall’s soulful folky jams, while Penny is a chameleon who shuffles everything from Top 40 Hits, to Grateful Dead, & everything in between. And when it’s studio manager Sandra’s turn with the aux cord, your can bet your red scarves she’ll be choosing Taylor Swift!
The rest of our little team never complains because her upbeat bops help keep us energized & those heartfelt ballads are soul soothers on tough days!
Fun fact - even though these days you’re more likely to see her at a Widespread Panic show, WSW assistant manager, Penny’s first concert was to see Swift during her Debut era!
Sandra is one of the lucky ones to score tickets to the Eras tour during the infamous Ticketmaster debacle, and she had the time of her life in the Mercedes-Benz stadium in early 2023! There’s no use telling her “You Need to Calm Down” because this has been one of her Wildest Dreams come true! She's even more stoked now to hear that fans of the Jonas Brothers & other artists are making friendship bracelets to trade too!
And since she’s not on her own, kid, there are plans to “make the friendship bracelets” with her besties to trade with each other & other antihero Swifties at the show. This passion project has lit a creative match amongst our team, and because Sparks Fly, we wanted to share with you all!

➡️Get your bracelet supplies here⬅️
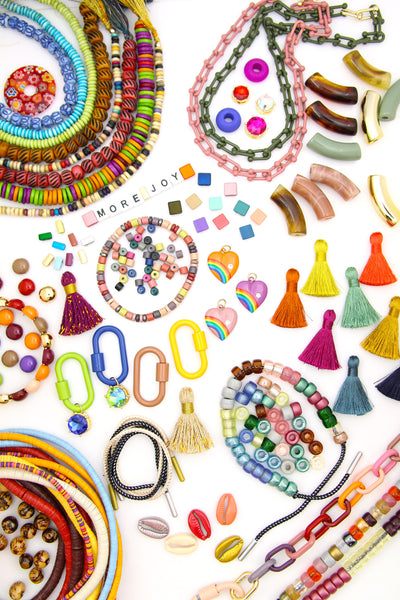
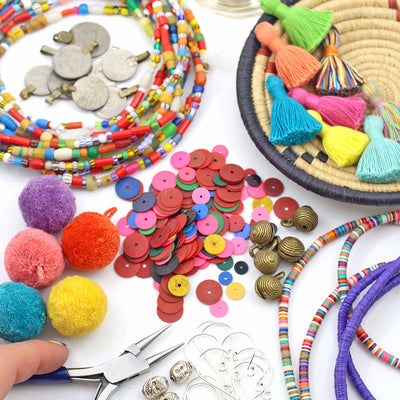
While living for the hope of it all, we put together a Friendship Bracelet Kit, full of handmade & unique beads. Each kit makes 16 beaded bracelets on average, and the contents pair well with lots of other colorful beads & charms! Whether you’re heading to the a concert, or dancing around your living room, you can be Bejeweled when you walk in the room.
These beaded beauties are perfect to be worn in an arm party stack, hand out to your besties, or even trade with new friends at a show. These kits aren't just for Swifties either, some of our creative soulmates have also made bracelets to trade at Jonas Brothers concerts, birthday parties, music festivals, & beyond!!
I don’t know about you… but I’m feeling crafty too!
How to Enter Your Bracelet Making Era:
- Pull out your Friendship Bracelet Kit, choose a color story for your bracelet, and decide if you want a pattern, or to spell out a word.
-
Once your design is planned out, cut a piece of elastic about 18" long. This should give you plenty of room to work.
Pro Tip: I like to put a piece of scotch tape or washi tape on the end of my elastic so that the beads don't spill off the end.
- Use the threader to thread the elastic onto the needle. We recommend doubling the elastic for maximum durability.
-
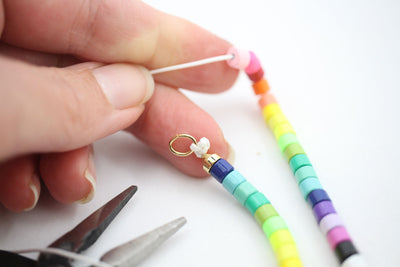
Start stringing beads onto the needle, and then elastic. If your bracelet is going to have letters, it may be best to string letters first so you're sure to have room for them. It's helpful to pause & measure every so often to see the length* of the bracelet, so that if adding letters, it’s clear when to add them.
* For adults, 7.25-7.5" seems to be a good average length, and for kids, 6” is about average. You can wrap a string around your wrist and then measure that against a ruler to get a more exact measurement.
-
Check to make sure that your bracelet will fit. You want it to be comfortably snug, as it's elastic. Once you've confirmed the length, it's time to tie the knot.
I like to tie a standard square knot. To do this, take the right side of elastic and loop it over the left side, and pull it underneath. Repeat the same step with the left side. So the knot should go right over left, then left over right.
-
When you are ready to tighten the knot, stretch the beads tight, so that the knot will sit snuggly.
Optional: add a dab of G.S. Hypo Cement Glue to the knot. The type of elastic in our Original & Deluxe Friendship Bracelet kits is "grippy" so this step is not necessary, but provides extra security.
I love this glue because it's sturdy, but it also has a needle applicator, so it's easy to get it in tiny spots just where you need it. Let glue dry a bit before step 7.
- Trim off excess elastic & voila! You have a new bracelet, fresh from your bracelet making era!
- Repeat steps 1-7 for your next 15+ beaded bracelets!
Long Live all the beaded magic you'll make 😉
- Team WSW


Thank you for this tutorial! Had such an absolute blast making bracelets with my girlfriends before the Arlington show & the steps were so easy to follow! We feel like pros now <3
Leave a comment