How to Make Rave Kandi Bracelets: The Ultimate Guide
Exchanging gifts is a popular way for people to show appreciation for one another, and exchanging the type of gift that you have made yourself is a popular way to give a bit of yourself while accepting a bit of someone else at the same time. One popular type of exchange where this happens is with Kandi bracelets at EDM festivals and raves. Kandi bracelets can be relatively simple, or they can be a bit more complex, but each expresses its maker's sense of style, and in a setting such as a party or a rave they can even provide a sense of community and pleasant memories of the event. For many, the exchange of bracelets at raves has branched into its own culture that celebrates peace, love, unity, and respect.
How to Make Rave Kandi Bracelets
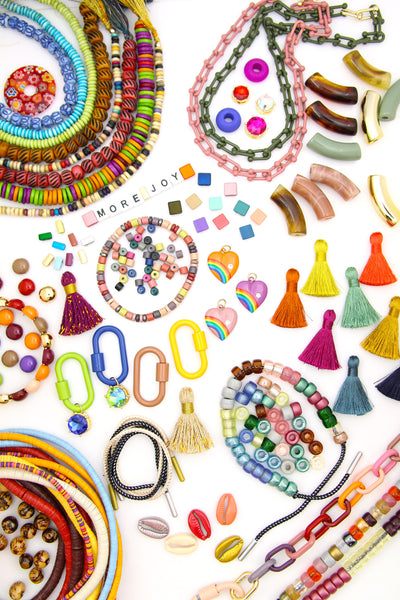
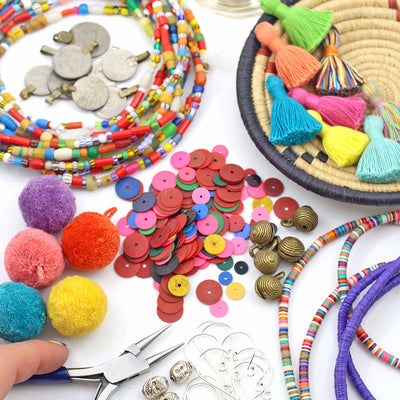
One of the most popular materials to make Kandi bracelets from is pony beads, and also there are many types of seed and bone beads that have the same ability to be easily strung, and will provide a beautiful and unique piece of Kandi. The wide holes make for easy stringing and allow for many bracelets to be made in a short amount of time, which is important if you are looking to share with many people. If you are just getting started in making bracelets, this is likely where you will start.
Making a Single Strand Bracelet
Choosing Your Beads
While pony beads are the most common, especially for beginners, various other types of seed beading or other uniformly sized beading is also a good choice when it comes to making Kandi bracelets. It is just important to remember that the smaller the beading and holes are, the more likely you are to have challenges when you make them. However, smaller beading does allow for some more intricate designs, so you will have to decide what your goal is for your Kandi.
Pick out the specific beading that you plan to use and arrange them in the pattern of your choice. The pattern can be anything, including a single color, a rainbow, or something totally random. Whatever you decide, there should be a sense that you have made your choice on purpose.

Measuring Your String
The standard measurement for an adult women's bracelet is about 7 inches, while men may need nine or ten inches. If you have your model available, you can simply wrap the empty string around their wrist, and then add two inches to ensure that it will be the correct length after it is tied.
Prepping Your String
In most cases, some sort of elastic is best for making Kandi bracelets, but it is important not to just cut the string off its roll and start threading your beads. The string will need to be stretched several times to help assure that it is secure and to make it easier to work with. Using elastic does allow for the bracelet to stretch over the hand, however, some people like to include some sort of clasp. A clasp can make it much easier to release a single bracelet from your wrist without getting it tangled with the other bracelets you might be wearing. If you are using a clasp, attach one end of the clasp to one end of the string, and set the other half aside.
If you aren't using a clasp, you may want to use a stop bead. With a stop bead, you loop one end of your string through a single bead and then back through, so it does not easily fall off the string. With this method, you won't have to continually watch your beading to make sure they do not fall off while you are stringing.
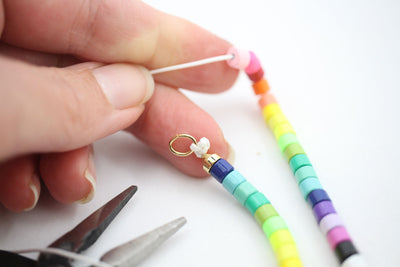
String Your Beads
String your beads according to your pattern, until you are near the end of the elastic. If you are using a clasp, secure the other end of the clasp to that end of the string and put the clasp together over your wrist. If no clasp is being used, unravel your stop bead, and tie the two ends of the bracelet together, taking care not to let any beading fall off during this process. You will want to double knot the string, or perhaps even triple knot it to make sure that the bracelet is secure. You can then tuck your knot inside one of the beads if the hole is large enough, so that it does not easily show.
Making a Cuff Bracelet
Prepping Your Beads and String
Making a cuff bracelet is a bit more challenging than a single strand bracelet, but the concept is similar. You will need to pick your beading, your pattern, and prepare your string before you start stringing the beading. You will also need much more string or elastic to make additional rows for your cuff. About three feet of the string will make a cuff with eight rows of beads. You will also want to lay out your beading in the order you are choosing to string it in. This may be in a geometric image or some other intricate pattern.
String the First Row of Beads
For a cuff, it is much easier to not use a clasp, but to instead rely upon the elastic to hold the bracelet in place. You can keep track of the end, or use a stop bead for the first row. When there are enough beads for a single layer to go around your wrist, remove the stop bead and make a knot. The string should be short on one end and very long on the other, as you have got more stringing to do.
String Your Second Row of Beads
To make your second row, start threading in the second bead of your pattern, and string through every other bead; the beads will have a staggered look as you do this.
Threading the Third Row and Beyond
When you get around the bracelet for the second time, you will stitch through the odd beads instead of the even ones. The more you add additional rows, the more solid your bracelet will look and feel. As long as you are confident that you can make it around your cuff with plenty of string to tie your cuff, you can keep going. Ultimately you will want to stop at the end of a row to assure that your bracelet looks even. Tie the end securely with at least a double knot, and trim any excessive elastic you may have. Stretch the bracelet over your hand to wear.
Get All the Beads You Need to Make Your Kandi
Once you get into a habit of making Kandi bracelets, there is a good chance that you will find the process a bit addictive, and you are going to need more supplies. Woman Shops World is a great place to find all the beading you need for all your exciting creations. In addition to pony beads, you'll also find various seed beads, African trade beads, or candy disc enamel beads that will help you make your mark on any rave or party, or to keep, give or even sell. To check out our entire selection of affordable beading and other craft supplies, see our kandi selection today.


Leave a comment